A couple of weeks back I finally obtained a copy of Fleet Command.
Sure, I had to fight for it, but I think Viking1 is recovering nicely..
Seriously, when I saw this one sitting on his shelf I thought
to myself, "I wonder what this game is really like?" I had read various
reviews and even a few in print (gasp!), and was a bit hesitant to make
the investment. But it turns out I'm having some fun with it!
Fleet Command strikes me a bit like a navalized version of TAW,
but lacking the ability of first person command (still love that game,
in spite of the nasty process of release in stages.)
For those who haven't read the reviews,
I'll begin with an overview, including some of the quirks of the game.
All that I write applies to the patched version. I highly recommend you
download the same and apply prior to Command! You will then have to go
into GAME OPTIONS and turn ON features like "Ships Auto-engage Incoming
Missiles" and "Aircraft Auto-engage Hostiles."
Jump in and Swim
Please DON'T jump in and swim. You will find yourself immediately
overwhelmed if you do what I did and skip the manual and simply dive
into the first campaign. More on that first campaign later...
Not that the manual is very helpful. It is sparse, as too many
are these days, with the exception of coverage on the mission editor.
But DO use the tutorials. They don't take very long and they will save
you some frustration. They even use voice narration, though I think
there is a bug or two in them yet to be killed.
After you complete the tutorials, go ahead and launch a single
mission or two. I recommend the first in the list: CVBG Norwegian Sea.
In this mission you must protect your carrier group from a cruise
missile attack.
Prior to the v.1.1 patch this was a bit of a pain since there
was no way to automate your missile defenses. Post patch it's a simpler
process, but there are still a few things that will help you.
First of all, you do need to know a bit about the more active defenses
on board your carrier. This leads to my first rule of naval engagement:
Increase Your Vision.
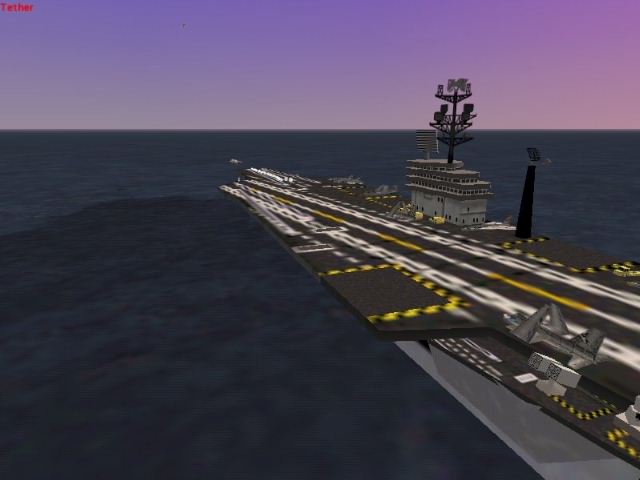
Launch your E2 Hawkeye immediately, followed by your EA-6B Prowlers.
The Hawkeye enables you to see a long way around you without making
your carrier group show up like a sun in the night with its active
sensors. The Prowler can jam another ship's radar, making it hard for
that ship to defend against your Ship to Ship Missiles (SSMs).
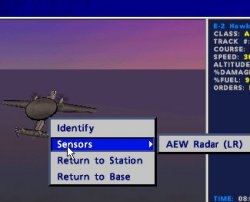
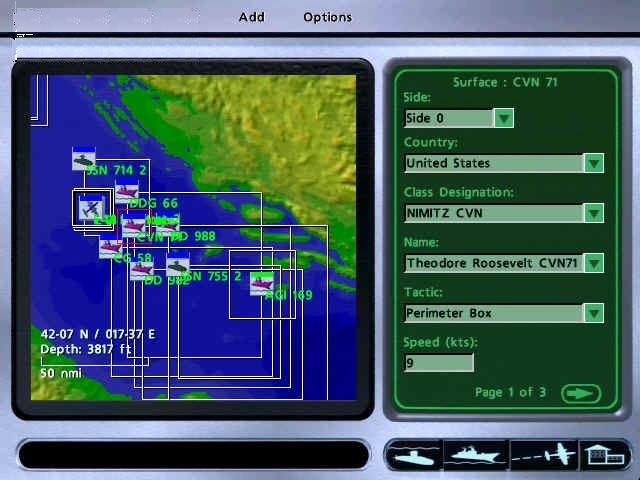
Those Quirky Sensors
At this point you run up against the first quirk in Fleet
Command. You must manually select the E2 and order it to turn on its EW
radar systems. In fact, you must do this with every aircraft you deploy
or they will fly blind.
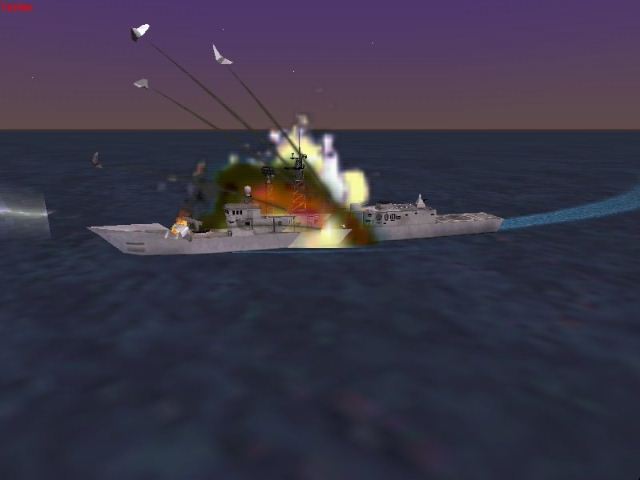
The point is to both defend yourself and take out the offending
ships as quickly as possible. The SM-2 is a very fast and effective
missile and you will need to launch more than one per ship in order to
overwhelm their defensive systems.
Take the Fight to the Enemy
This is rule number two. Your next step is to launch your F14s,
primarily for the purposes of self-defense. Another of the glaring
omissions from the original release was that you couldn't arm your
aircraft as you would choose, but never fear, JANE'S is here! Yes, they
added selectable loadouts in the patch, and
right-clicking a specific aircraft in the flight deck dialog pops up a
menu with up to 4 options:
ASW (Anti-submarine Weapon)
ASUW (Anti-Surface Unit Weapon)
AAW (Anti-Air Weapon)
Strike (Primarily Anti-Surface Unit Weapons but will also include Anti-Aircraft Weapons)
Once your Tomcats are airborne select them (tether them is the term the
designers use) and order them to VIS ID the unidentified ships to the
NE and North. Then while you still have an aircraft selected, press SHF
3 to order FAST intercept. Actually, you won't have to ID the ship to
the north since it will begin launching cruise missiles at you... a
good indication of intent!
At this point if you have armed your Tomcats wisely (sic) then you
can simply give the order and it will be AGMs aweigh! This was really a
HUGE change in the game and it's one heck of a lot easier to take out
those bad seagoing guys.
Remember that your missiles are more likely to be effective it you jam
the enemy ships, so select your E6-B and then hit "C", you can then
right click on the target you want to jam and the Prowler pilot will
take care of the rest.
Your next step is to take out the offending Backfire bombers.
These ones should show up on the screen once your E2 radar goes active.
When Fleet Command was released you could send out a fighter to ID an
air target, and if the target proved hostile your aircraft would simply
call the ID then turn away. Fortunately in v. 1.1 there is a
configuration option in SETUP that allows you to put the gonads back in
these boys. If you want them to use a particular weapon, however, then
you must bring up their ENGAGEMENT menu.
Shortcuts
Thankfully, however, there are some shortcuts out there, and the keyboard file is only an F1 press away.
One of the biggest issues is remembering who was sent where to
do what, especially when the missiles are really flying. (Dang, this
game just BEGS for dual monitor support...)
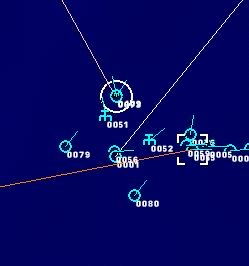
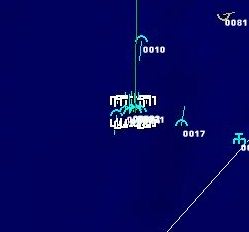
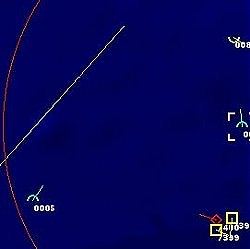
You can use the SHF M key to bring up a whole swatch of color coded
lines that indicate current orders for all your platforms. Sure, it
clutters the screen, but you can use SHF M to turn it off again as soon
as you survey the state of affairs. The lines you see below tell me
that I have an E6-B jamming one target, and two other aircraft with
orders to ID targets.
You can also PAUSE (P key) the game when things are crazy to
have a look around. You can click on objects and select them, though
you can't issue most orders in PAUSE mode.
The Best of Times, the Worst..
Occasionally, you will launch a campaign and get slaughtered. It
happens to the best of us. But it's time to cheat when this happens, so
here is what you do.
Save and quit the game, then use the REPLAY button on the
Debrief screen. THis screen will provide you with tons of useful INTEL,
showing you all the platforms (even the subs) that you needed to kill.
You can now replay the mission or jump back into the saved mission and
take care of business.
Mission Builder
Fleet Command is even more fun when in multiplayer mode. There
really is too much to do in many of these missions for a single player
anyway. Check around the net for some custom mission downloads, and
there are also a few on COMBATSIM.COM. You can send us your favorite
missions by clicking HERE. Send them in ZIP format and include a brief explanation.
Other Mods
Heck, you found out that your favorite platform isn't available, or
that the weapons characteristics of your favorite missile aren't quite
accurate. No worries, where there is a will.. there is a download! And yes, the Phoenix missile is also available in the patched version.
"This is an ongoing project that I am undertaking to make Fleet
Command more realistic than what is presently is. Hundreds of "tweaks"
have been made to the database over the course of this project for
better performance of weapons and platforms. Thousands of corrections
to the data in the original databases have already been implemented and
tested. Any and all questions concerning this database project can be
sent to Warship." Note: Version 4 should be out by Oct.15.
AirUpdate v2.1- by Chris Thurmond. This download updates the Aircraft database.
Manipulates Object, Launcher and ShipBasedAircraft records. Modifies
existing records and allows for thus created records to overwrite the
original or be added as a new record. Copies new 3DObject record for
any new Object records. User has choice of specifying which 3DObject to
use. Imports and Exports Object, Launcher, 3DObject and
ShipBasedAircraft records.
All these downloads and more can be found on our Missions Download page.
With a few more missions under my belt, and with requests coming in
from all levels of command for more INTEL, here is another briefing for
newcomers to Fleet Command.
The Sky is the Limit
Aircraft Ops are not a matter of point and shoot. While the
patch has made operations somewhat easier, there are still some finicky
aspects to effective use of air power.
Rule 1: Use Groups. The first few times I played FC I was going
crazy trying to coordinate single aircraft. Easy answer: create groups.
If you need more than one aircraft to accomplish a task, you need to
strategize when you are at Flight Deck level. First, how many do you
need? Second, what will your force composition be? Third, what armament
will they require?
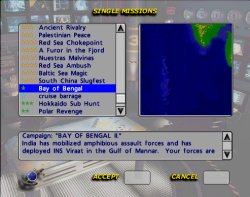
For example, in the Bay of Bengal you will be required to take out
an airbase way up North. You could send a simple strike force with
HARMs and Mavericks and an EW aircraft like the Prowler. But you might
also need air cover.
Let's say you take four aircraft plus the E6-B. A good force
composition would be two Tomcats and three Hornets plus the EW unit.
Arm the Tomcats for air to air and the Hornets for the strike. Launch
all at the same time.
The next step is simple. Just right click on the screen when
the aircraft are airborne and then drag a box around the group. Now hit
CTL 1 and you have created a group! Issue an order vector and they will
all comply (you will only hear a single response, but you'll see all
turn to the north.) When the group reaches their rally point you will
have to issue individual orders to the various aircraft with respect to
their targets.
More Management
Issuing orders to aircraft still involves more management than
it should given the scope of the game. For example, if you issue an
order to go high (SHF 9) and then command a new heading, you will find
that your aircraft goes back to standard altitude (10K feet). You must
re-issue the altitude order if you desire a high transit.
Dodging missiles is similarly complicated. If you order an
aircraft to transit near an enemy platform and he is fired on, it's
wise to do some micro management. If you order him to break high (SHF
9) then increase speed (SHF 3) his chances of survival will increase.
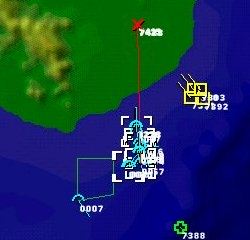
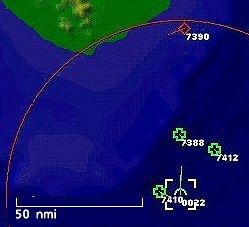
Strike Group with designated CAP
Using helicopters is also a bit complex. Once a search task is
completed these guys will just hover around and drink coffee. Likewise
if they run out of the sensor you chose, they may just sit around doing
nothing. You'll have to designate a new search area, or when they run
out of sonabouys, send them back to the ship.
Coordinated Attack and Sub Comms
Some attacks in FC must be coordinated. For example, a Strike
mission alone won't take care of the airport mentioned previously. But
neither will launching long range missiles; they will simply be knocked
off by the airport defenses. It's wise to send in the strike aircraft
first, and then as they are finishing up the defensive systems launch
your TLAMs from the fleet.
It's a good idea to set up sub comms for at least hourly
communication. You can do this in the Preferences screen. The first
time a sub surfaces for contact you can order them to stay on the
surface until you give another order if you wish. Don't worry.. if they
run into trouble they will dive to safety.
If you order them to stay in contact (CTL C) and then issue a
transit command to a new location, they will dive and break contact. So
be aware that you will lose comms until they reach their new location.
Finally, you will soon be aware that weapon distances vary
greatly. The Harpoon is powerful and has a fantastic range and isn't
dependent on a radar signal from the source like the HARM. However, it
is not terrificly fast and is subject to jamming or being shot down.
You will sometimes want to provide backup in the form of an E6-B
Prowler.
Similarly, don't waste your long range air to ground missiles against
important targets. Usually these targets are well defended and you will
need to send in a wild weasel mission prior to engaging from your sea
based platforms.
Finally, SAVE frequently. Random crashes are not unusual and if you lose an hours work it's frustrating.
The following page shows some engagement distances with a few different
air to air and ship to ground based weapons. You can also download a
slightly modified Bay of Bengal campaign. The campaign has increased
slightly in difficulty and now begins a bit later in the day so you can
enjoy the 3d views more. Click Bay of Bengal II to download. Unzip the file to your /scenario directory and you will find it under Single Missions.
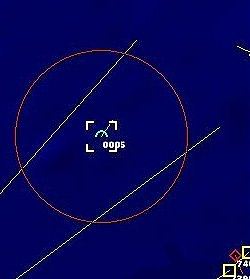
AIM 120 Range
Phoenix Range
The range of the AIM120 is less than half that of the Phoenix missile.
I had to shrink the full image slightly to fit in the column width so
you don't actually see a 100% accurate comparison.
Harpoon Range
The range of the Harpoon, a ship or air mounted weapon, is around 45 miles.