The campaign in Falcon 4 is generally acknowledged as the most
comprehensive yet created. As such, it is a tough place for newbies and
intermediate players to begin because it has a very high learning
curve. This series of essays consisting of three parts is intended to
help you improve your performance on air-to-ground missions.
If you're new to air combat simulations, the first thing you need to
know about this Falcon 4 is that to be successful requires mastery of
the aircraft and its systems and weapons. So, if you're not yet up to
speed, you're going to need a bit more study and practice before you
can put these tactics to use.
I've surfed around the various forums and I see it declared time and
time again that the campaign is broken and/or full of bugs. I can
assure you that after nine months of working with it, and a half dozen
patches, the campaign works fairly well and what bugs it does have are
relatively minor. What most people complain about as bugs or brokeness
is really the result of their own lack of dedication and practice to
achieve competency.
The first consideration toward becoming a competent Falcon pilot is
control. The number of commands required to operate this aircraft is
extensive. It is not possible to achieve a reasonable level of
competence with the keyboard alone because this sim requires too many
split-second reactions.
If you're not flying with fully progammable controls, it's time to make
that investment. Life will be made a whole lot easier if you choose
controls for which at least several F4 scripts have been written so
that you don't have to attempt to do the programming yourself.
Training & Skill
F4 represents one of the first, if not the first, truly realistic air
combat similuation that melds tactical and strategic air and ground war
gaming into one sim. At first, glancing at the campaign map, I thought
it was hokey and rather childish looking. It took months of
experimentation to discover the awesome depth of this sim, a depth
which myself and many others are still discoving nine months later.
The problem most of us have in mastering the campaign is twofold.
First, Falcon's fidelity to the real aircraft systems means that a
virtual pilot has to know his aircraft and weapons nearly as well as a
real pilot. Ask any real pilot and he will tell you that by the time a
real pilot is finished with his two years of training he knows just
enough to go out and get himself killed. We are talking about full-time
professionals here, not amateurs.
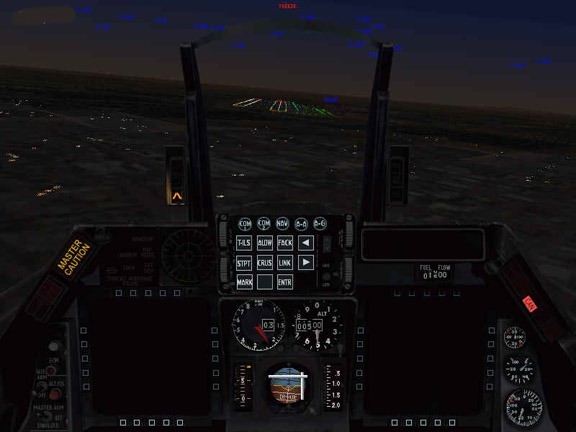
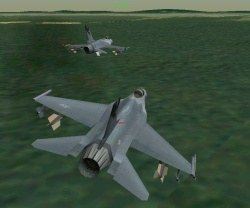
Landing with all systems out. Without mastery of systems and navigation, you'll never be able to do this.
Most will tell you that whatever training they get is not enough. The
training goes on and on for the duration of the pilot's career. Rest
assured that there has never been a wartime ace with only two years
training. The need for extensive training is little different with this
sim.
Those Pesky Wingmen
This pretty well sums up why there are so many who believe that the
campaign still has major faults with the AI. This includes the subject
of wingman effectiveness. The difficulty that so many are having with
wingmen boils down to a lack of training. Both in the real world, and
in this sim, wingmen are not freelancers. They must be at all times
under the strict control of their flight leader -- you.
To better understand this, consider that it was Air Force doctrine in
past wars that wingmen were not shooters. Their sole task was to
provide cover for the leads who were designated the shooters. In fact,
during the Vietnam war, they stayed glued so tightly to the lead that
it was all they could do just to keep formation. Following Vietnam this
was finally realized to be a very poor tactic and was changed.
Yet the fact remains that wingmen are still never permitted to go off
and do their own thing. Whether it's a two or four ship flight, it is
always a team effort, and the wingmen only take their cue from the
lead, usually officers with ranks as high as Captain and Major.
As in real life, that is the way this sim is designed, so you should
not expect wingmen to function otherwise. If you do not completely
control their actions, they will not perform adequately.
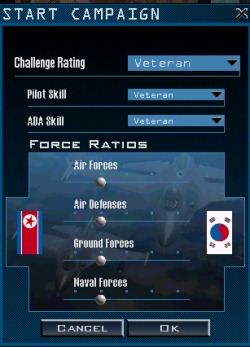
Difficulty Levels
I have counted up to 14 difficulty level control settings, so be sure
you understand them. Or try to. I'm not sure I understand them all
myself. The point is, don't be shy about starting off at settings that
match your skill level. If you try higher settings, you'll only get
needlessly frustrated and your ability to learn will be impaired.
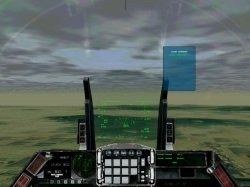
Campaign start window. Difficulty and Force Levels.
Learning the F-16, its avionics and weapons systems is not easy in
itself. To that we have to add mastery of formations, mission planning,
A2A and A2G combat, as well as weapons delivery and missile avoidance.
I'm sure I forgot a few things there, but you get the picture.
There are a large number of aspects we not only have to learn, but to
completely master before we can expect all our wingmen to hit their
targets, and prevent SA-7s' and AA-10s from flying up our tail pipes.
If you don't first master the basics, then it is going to be impossible
to master flight leadership. For in the real world, leadership places
an enormous burden on the lead, a burden which few men are able to
handle well.
It is no different in this sim. If you want to fly lead, even in a solo
campaign, then you have to assume and master that additional burden. If
you don't believe me, then just go try to fly with one of the better
virtual squadrons and see how far you get with them. Most wont even let
you fly with them until you can prove yourself.
What does mastery mean? It means that when the AAA and SAMs are coming
at you hot and heavy, your reactions are automatic and correct. You
don't have to stop and think about what to do, you've done it right so
many times in the past that the reaction is automatic. This is equally
true for controlling weapsons delivery by wingmen.
Flight leadership means that you can refrain from trying to be a one
man hero, and that your primary interest is on the success of the
entire flight. Like a real pilot, you not only want them to hit their
targets, but to RTB safely. On this point I might add that my campaigns
really started to become successful once I started bringing my wingmen
home safely. Why? Because I stopped thinking about myself and paid more
attention to the wingmen. Three air craft can do a lot more damage than
just one, even if you never fire a shot yourself.
It is possible to get a 100% weapons kill rate on a mission, and to
consistently score 80% or higher. Once you gain mastery, this becomes
fairly easy because you are doing things right most of the time on a
reactionary basis. The following discusses some of the means and
methods to achieve this.
Wingmen & Weapons
Air to air missiles are fundamental, of course, but there is a huge
variety of ground weapons that could take years to master. It's a good
idea to start out with just a few and work with them until you know
their performance and parameters intimately. I would recommend the LGB,
the standoff missiles Maverick and HARM, and CCIP delivery of iron
bombs. Once you learn these, you'll be well on your way to mastering
the others.
On this point, please note that all weapons have their limitations, and
most of those limitations are included in the sim modeling. So before
you blame the sim for not working right, be sure that you know the
weapon operation thoroughly.
Taking Command
Commanding wingmen to deliver weapons is vastly different than using
weapons yourself. That's because wingmen are not sitting in your
backseat, but are located elsewhere.
Consequently, they do not have the same perspective, the same ranges
and vectors as you. They may be evading an enemy attack, while you are
not. You may be in range while they are not. Moreover, when involving
wingmen, some weapons are a lot easier and more forgiving than others.
The problems are directly related to target acquisition and how well
you can control wings to put them into firing parameters. Simply
targeting or ordering "weapons free" won't cut it.
If, for example, you order a wingman to attack, and he is out of range,
he will fire anyway - with no score. If you order a wingman to fire a
Maverick, and the wingman is on the side of the target that does not
have a heat signature, then the Maverick won't guide.
If you order an attack on a target that you've already fired at and
hit, the wingman will also score a goose egg. Many of the same problems
exist for laser guided weapons. The heat and smoke from burning targets
often interferes with laser targeting. All of this constitutes fidelity
to reality and is not a fault of the sim. If you haven't recognized the
realism in the design, it's your fault.
Wingman Orders and Effectiveness
Wingman effectiveness increases proportionately to your ability to
control them and keep them within best weapon parameters, and out of
harms way. There are nearly a dozen formation commands, each of which
you need to understand. In addition, there are the three wing radio
commands to your wingman, the 2nd element, and the entire package.
Unless you understand how to use each of these instantaneously in the
heat of battle, your mission is not going to be very successful.
For a four ship flight on an attack, you have only to issue commands to
your wingman (#2) and your second element lead (#3) that in turn will
direct #4 as you instructed. These are the "W" and "E" commands
respectively. If you use the "R" command for the entire package, you
may not get the results you expect if the flight is not in proper
formation, for they will all be firing at the moment you direct them
to, possibly without being within weapons parameters, and likely at the
same target. You don't get credit for killing one target three times.
One method of exercising precise control is by standing off the target
yourself and circling at a distance somewhere just beyond the IP. In
other words, you play the Forward Air Controller while the wingmen do
the shooting. In circling, you will alternately come into, and go out
of target range. The idea is to choose a formation that will allow you
to keep your wingmen in a good position to strike.
For example, at the IP, I can order a close spread formation. As I come
within range of the target, I designate it and order the second
element, which is on my left, to strike. Once he acknowledges, I turn
away to the right, keeping my wingman with me for cover. Switching
radar to AA, I circle around and keep an eye out for interceptors. If
there are any, I may have my wingman engage them.
By the time I complete my circle, my second element should be about
done with the first attack. They are out ahead of me so they can be
seen as I come back on target heading. When finished, making sure that
they do not extend too far, I order them to rejoin, or RTB. Why RTB?
Because if you're going to make an attack, you don't want them coming
along with you needlessly. When the attack is completed, then they can
be called back from the RTB command.
The objective here is to know where they are at ALL times. If my timing
is good, I designate another target out ahead, order my own wingman
(#2) to attack that one as the 2nd element is returning. As soon as he
has dropped his load, I order him to rejoin. Thus, at all times I know
where my wingmen are.
Now, if there aren't swarms of AAA, SAMs and interceptors coming at me
(which there usually isn't because I have already flown a dedicated
recon and have prepped the target on a SEAD mission that will be
discussed in Part Two), this process can be repeated all over again
until all weapons are expended.
Keeping an Eagle Eye
All the while this is being done, I am keeping a close eye out for
interceptors and SAMs. If the wingies are being threatened, they are
called off immediately with "rejoin." One must be very careful that
they are not going to extend or circle over a nearby air defense site.
If the mission has to be aborted, there is always the option of hitting
a second target, usually one which was planned at the outset. Barring
that, one can always keep the flight with you to attack any target of
opportunity on the way home, such as a couple of stray bombers or
transports.
Notice here that nothing has yet been said about the flight lead
attacking the target himself. Employing this standoff method, the lead
acts as a FAC (forward air controller), and control is what he does. If
there is anything left to hit, the lead can then be the clean up man
and go in himself.
But if you need to do clean up, be sure that you are not dragging your
flight with you to get shot at. Send them RTB and then recall them when
finished; they will still return to the flight.
Choosing targets. Notice the radar coverage circles.
Targeting
This is another critical element of success where you have to
understand the limitation of your weapons: target spacing. Mavericks
will work well on a stationary group of tanks, but when those very same
tanks are rolling down a dusty road throwing up clouds of dust, the
Maverick won't acquire!
This sim is sufficiently well designed that it takes these seemingly
minor details into account. Another example is that the Maverick will
only lock on the sunny side of some buildings or other objeccts. If you
order an attack on the shaded side, forget it. No joy. You'll find
similar problems with laser guided weapons. The point is, don't
underestimate the realism here. If your wingmen aren't performing well,
it's probably your fault and you need to adjust your tactics.
Alternate Methods
The best method of attack is largely dependent on the target.
For very hot targets, the FAC approach is not a good one. For hot
targets, you need to get in and out fast. However, there is a problem
with four aircraft hitting the same target. When you designate with a
weapon, there's a big chance that they're all going to hit the same
target. Or, if it's an electro/optical weapon, after the first
explosion, the others aren't going to be able to lock on.
It's best to avoid this situation and try to pick target groupings that
are about 20 - 30 degrees apart so that all you have to do is swing
your nose a short distance to get a lock-on. Close enough that you
don't have to waste time turning from one to the other, but far enough
that there is good target separation to prevent incindiary
interference. Send the second element to one, taking the other
yourself.
In other words, you swing right, designate, and call the attack for the
second element. Then you swing left, and call the attack by your #1
wingman. If you've got time, then pick yet another target for yourself.
This is a good option when you want to extend beyond the target on your
egress, rather than turning back 360, losing energy and exiting the way
you came. It's very good for when you've snuck through a MiGCAP, and
perhaps want to hit yet another target beyond the first. As soon as you
have passed over the target, call your flight to rejoin and close up,
then you can decide whether you want to try that again.
Once the basics have been mastered, then you can become creative and
test the limits of the sim. Sound mission planning is equally critical,
and so is having good intel on the target. Just flying head-on into a
heavily defended target is as suicidal in this sim as it is in real
life, so don't do it. Fly a target recon, SEAD strike, or both to get a
handle on what to expect in the way of defenses and reduce them.
Once the target has been prepped, then a direct overflight with your
package in trail is possible. Again, however, you have to take note of
target spacing and whether your wingmen's weapons are suitable for the
task once you drop your ordnance. In planning the mission, it's a good
idea to try to divide the target up into two separate targets for each
element to attack.
This
mission pulls an 86% weapons kill rate. Even though it gets a mission
failure, all the targets remain dead and advance the campaign.
Carry One HARM
Carrying a single HARM can be a great help for keeping SAM radars shut
down during a strike when you are acting as FAC, and you've got just a
couple radar guided AAA or SAM sites threatening. In most cases, they
will shut down when you target them with the HARM. If they don't shut
down, let 'em have it. HARMS are big and reduce weapon load, so don't
carry it unless really needed.
Another advantage to carrying a HARM is that the HSD will plot the all
the air defense radars for you (except the SA-7) and give you a good,
quick visual of what you are facing. The downside is that during an
attack, it takes time to change weapons and accomplish this.
Mission Study & Review
The mission Debrief window has been fixed and is now working properly
with the 1.07 patch. It can be used to accurately evaluate your
performance.
The most important thing one can do following a failed mission is to
review it and find out what you did wrong. The same applies to finding
out why successful missions were successful. Sure, that is yet more
time-consuming work, but that is the whole point of debriefing -- to
reinforce your understanding of what you did right or wrong.
After a while, you will notice certain patterns developing that will
give you even more insight on what makes for a Sierra Hotel pilot. If
you're not willing or able to make the investment in time, study and
practice, practice, practice, then you have no reason to expect to
succeed or improve. This is not an arcade game and is not intended to
be easy.
If you don't already have a screen capture program, I recommend getting
one. Screen caps are immensely useful for reviewing your missions. Not
only can you take snaps of the campaign map for use in planning, but
taking screen shots during an attack records lots of useful information
for finding out what went right or wrong.
The clouds of dust will make the targeting of this group of tanks
impossible for the Maverick.
They can also be used for mission planning when flying a recon mission
over the target first. Take lots of snaps and you will have a record of
everything in the air and on the ground around the target.
Parts 5 and 6 will discuss how to recon a target and the basics of mission planning.