To get the most from your EAW experience, you should install the latest versions of:
· The "Enemy Coast Ahead" patch, as it adjusts the damage from bombers'
guns to a more realistic level and gives Axis aircraft more potent
armament.
· The MeatWater soundpack, as it adds another layer to the realism of the game
PREPARATION
The tactics described below have been learnt whilst taking on
the role of Major of 4/II/JG2, flying Bf-109G6s from Creil, France.
As far as pre-mission preparations go, the EAW flight school
explains most of what needs to be done. However, when looking over the
pilots roster in the 'Squadron' section, it is important to consider
the default Schwarm assignments. II/JG2 are veterans of air combat over
Russia and begin the campaign with a good deal of experience (read:
kills), so it is prudent to divide the most experienced between the
Schwarms.
Choosing a wingman who you will favour throughout the campaign is also
a wise move. Don't be tempted to commit all of your best pilots all of
the time, as they will suffer from fatigue and new Staffel members will
never acquire the necessary combat experience.
As an added safety measure, and if you can spare them, designate one of
your Schwarms as your 'Fighter Flight' - this is just a mental note
when deciding on the allocation of your pilots. These can be used to
deal with enemy fighters should the need arise (hopefully it won't, as
their aircraft will be laden with the 20mm gun pods, but it's best to
plan for all eventualities.)
Once inside the cockpit, take off and climb towards your
target vector. Order your Staffel to tighten formation - it will help
concentrate your first pass attack.
At this point, it may be tempting to use the Alt-N shortcut to
jump to the next point of action. However, this can sometimes put you
in a disadvantageous position relative to the bomber formation and any
escorting fighters.
If you don't want to literally fly all the way, it is sometimes best to
use the Autopilot and then cycle through the time compression. By using
Alt-M, you can keep an eye on the map, and may be able to see friendly
aircraft ahead of your position, moving towards the target vector.
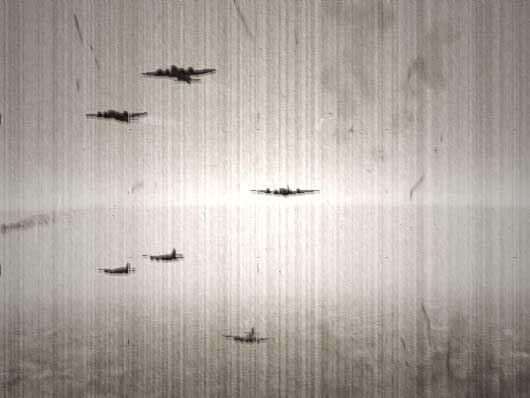
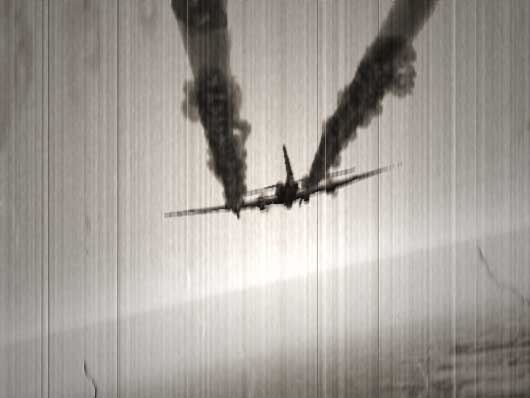
Pic 1. This approach is too far over from the bomber formation, making
accurate and effective fire almost impossible. Unless you break left at
this point, you will be exposed to heavy fire from the rear of the
formation.
FIRST PASS
1) If things have gone according to plan, when the enemy bomber
formation comes into visual range it should be no more than 20 to 30
degrees off either side of your nose. (If you use the HUD, you may want
to select the nearest bomber and hit F10 to see its facing position
relative to yours.)
2) Switch off the Autopilot, then shift the throttle up to full
and tell your Staffel to target the bombers. Order your wingman to
cover you. (At this point I also select the 20mm nose cannon/ 2x13mm MG
combination, but you may want to select all guns.)
3) The distance between your planes and the enemy bombers
should be closing rapidly, so it is very important to line up on a
target and concentrate on getting into a good attack position. Ideally
this should be head on and slightly above or below (See Pics 1 to 3).
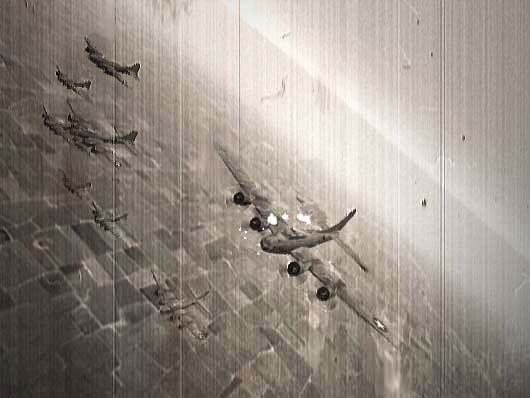
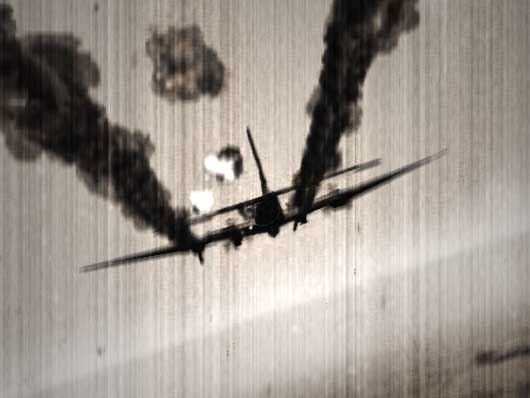
Pic 2. This is almost the best attack angle. The bomber in
the centre of the picture is the target. An attack from a slightly
higher angle will also be effective. This is also the best range to
begin opening fire.
Pic 3. This attack angle is too high, but could still be quite
effective if your aim is good and you calculate enough lead. Your
closure speed will also be high, giving you less time to fire.
4) As the details of the bombers become more distinct, order your
Staffel to 'Engage Bandits', order your wingman to cover you, and try
to remain focused on your target.
5) Open fire from close range. Try to aim for the inner engines
and/or cockpit area, and make every round count. On rare occasions, a
cockpit hit will knock your target out of the sky. Fuselage hits may
disable the gunners, and engine hits can slow the bomber down or force
it to ditch its bombs and break formation.
6) As soon as you pass the bombers break away and down from the
formation, jinking as much as possible to spoil the aim of any gunners
trying to fire on you.
7) Begin turning and climbing downwards once past the bombers,
cut the throttle to 80% and call ground control for reinforcements.
Next order your wingman to regroup, and select the pair of 20mm
cannons. Check around you for any enemy fighters, and check the bomber
formation to see how much damage your Staffel has inflicted. You may
want to order them to target and engage the bombers again, and order in
your 'Fighter Flight' if the escorts are causing too much trouble for
your men.
8) Give your wingman time to regroup (by cutting the throttle)
and continue keeping an eye out for enemy fighters. There are 2 options
at this point:
· If the bomber formation has stayed mostly intact, climb and
order your Staffel to regroup. Once you have regrouped, press home a
high-speed formation attack from above and to the rear of the bombers.
· If the bomber formation is in various states of disarray,
order your Staffel to attack, whilst you and your wingman head for
'Coffin Corner'.
'COFFIN CORNER' and Other Intercept Methods
'Coffin Corner' is the name given to the lowest level of the
bomber formation, usually on the right-hand side as you approach from
the rear. You should begin to head for the lowest three B-17s.
A good approach is level or slightly below and to the right.
The idea is to close at high speed and for you and your wingman to
attack the B-17 on the far right. You should try to close to about 300m
or less, opening fire with your pair of 20mm cannons, and then dive
away to the right. (You must judge for yourself how safe it is to
continue this attack prior to disengaging. A good basic rule is to
continue until your start drawing too much fire, and/or are heading on
a collision course.)
When you break off, it is best to put this (hopefully) damaged bomber
between you and the rest of the formation as you descend, as this seems
to prevent other bombers firing accurately at you. Order your wingman
to disengage and regroup as you make your way back to a similar
starting position to the one you made on this attack run.
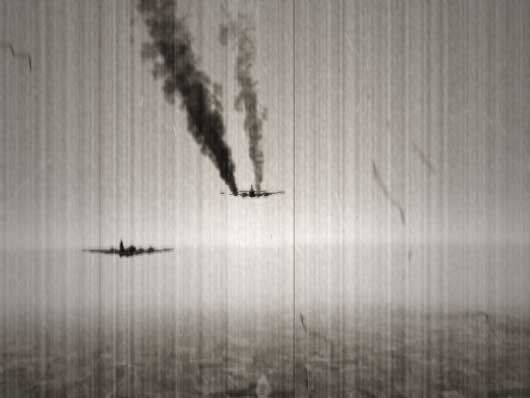
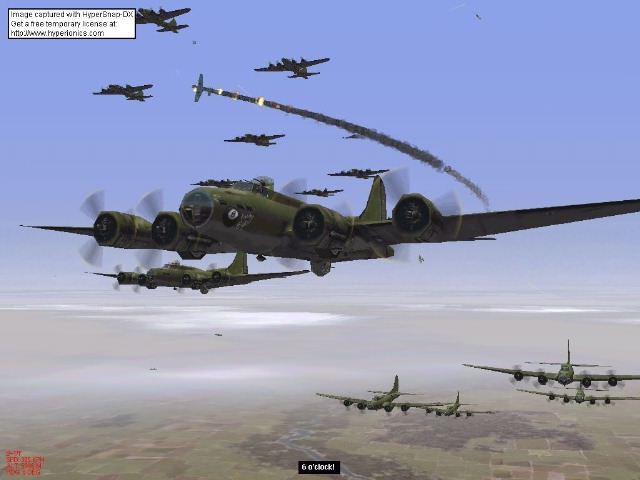
Pic4: Approaching the pair of stragglers, the target is the damaged
B-17. My wingman was ordered to attack the second, undamaged plane.
Bomber formations that have been mauled by successive fighter
attacks often develop stragglers. One or two badly damaged bombers may
break away from the main formation, or begin to lag behind.
· The former are often tempting targets, and can be chased and
shot down away from the protective fire from the rest of the formation.
The only problem is that the chase can take you some distance away from
the rest of the fighting.
· The latter are prone to the same weaknesses, but are
sometimes in formation with another bomber. If this happens, order your
wingman to attack this other aircraft, and press home your attack on
the damaged target.
In Pics 4 to 9, you can see the approach and attack on a pair of such stragglers.
Pic5: Getting into a good firing postion. Luckily, the bomber to
the left offers no opposition, perhaps because of crew casualties.
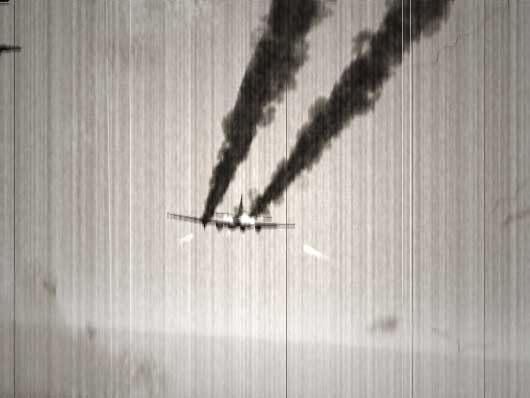
Pic6,7,8: Closing in on the target, opening fire at close range with
the underwing cannons, and scoring hits against the engines and
fuselage.
Pic9: The result : the targets' inside port engine catches fire and the B-17, fatally damaged, nosedives earthward.
Another attack method is to target the bombers at the top of
the formation. This can be done using the same method used to attack
'Coffin Corner', but you may have to spend more time climbing to their
level. Also, you should turn away from the bomber formation after your
attack, otherwise you will expose yourself to enemy fire as you drop
away.
POINTS TO REMEMBER
1) Attacks on bomber formations must be as co-ordinated as
possible. This means that attacks by your Staffel are more likely to be
successful if they are carried out as a group.
If this is not possible, you should at least try to attack with
the help of your wingman. Ordering your Staffel to disengage and
regroup as you trail the enemy bombers helps to concentrate your
offensive firepower and provide mutual defence. This takes time and
relies on your continual awareness of what is going on around you.
2) It is much better to break up the bomber formation and to take advantage in the gaps this creates in their defensive fire.
3) Always call ground control for more support. If you can assess what
direction this support will arrive and engage from, you can also time
any attacks by you to coincide and take advantage of the chaos.
4) Learn how to use your guns - their range, striking power and
the best combinations. Fire from as close as possible and learn to use
controlled bursts.
Whilst in combat over North Africa, the German ace
Hans-Joachim Marseille once destroyed 4 enemy fighters (three P-40s and
a Spitfire) in 20 minutes in his Bf-109. When he landed, his armourers
found that he had used only 20 cannon rounds and 60 rounds from his
machine guns! This shows what good marksmanship can accomplish.
Admittedly, bombers are tougher opponents, but well-placed, controlled
fire is very effective in disabling and then destroying them. Even
though cannon fire can inflict explosive damage from a distance, it
still requires that you aim correctly and apply enough lead to your
target.
5) If possible, avoid encounters with enemy escort fighters. In 1943,
the main form these take are the P-38H and the P-47C. The Bf-109G6 can
successfully take on both of these and even hold its own against the
P-38, which will not sustain many hits from your cannons. The P-47 is
powerful and can take a lot of damage, so if you have to take on this
aircraft, make sure that your wingman is with you.
6) Don't go chasing medals. There will always be plenty of
bombers to take on. It is better to keep an eye out for your Staffel
and make sure that they survive and become more successful in
destroying enemy bombers.
7) Beware of target fixation. You may get over-zealous when
making your attack, and get shot up
by your target, or by other bombers, or by an escort fighter on your
six. You may also put yourself into a position where collision is
unavoidable.
Closing Remarks
I hope these tips help you to stem the tide of enemy bombers over Europe and to manage Staffel
tactics!
So far, in my present 5 month campaign, I've shot down 9 B-17s,
2 Mosquitoes, 2 P-38s and 2 P-47s, and 4/II/JG2 have brought down an
average of 3 bombers per mission. At the moment, it seems, our small
part of the war is under our control...
References:
'Fighter Versus Fighter' by Norman Franks
'Messerschmitt Bf 109' by Jerry Scutts