
|
Wingman Mastery in Falcon 4.0
by Dave Pascoe |
||||
|
Difficulty Levels I have counted up to 14 difficulty level control settings, so be sure you understand them. Or try to. I'm not sure I understand them all myself. The point is, don't be shy about starting off at settings that match your skill level. If you try higher settings, you'll only get needlessly frustrated and your ability to learn will be impaired.
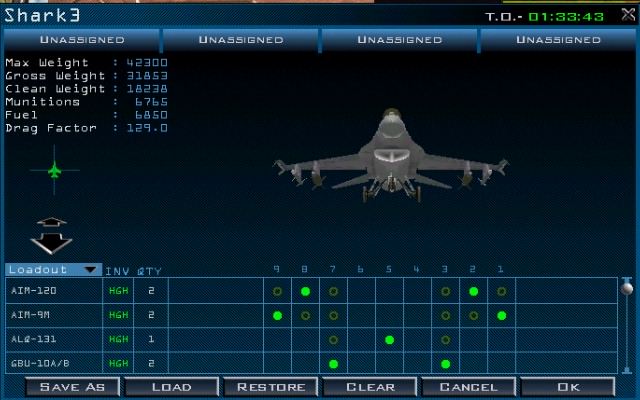
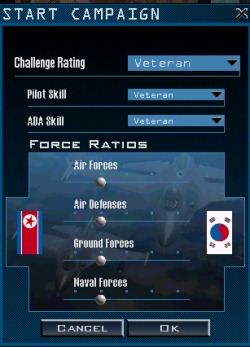 Campaign start window. Difficulty and Force Levels. Learning the F-16, its avionics and weapons systems is not easy in itself. To that we have to add mastery of formations, mission planning, A2A and A2G combat, as well as weapons delivery and missile avoidance. I'm sure I forgot a few things there, but you get the picture. There are a large number of aspects we not only have to learn, but to completely master before we can expect all our wingmen to hit their targets, and prevent SA-7s' and AA-10s from flying up our tail pipes. If you don't first master the basics, then it is going to be impossible to master flight leadership. For in the real world, leadership places an enormous burden on the lead, a burden which few men are able to handle well. It is no different in this sim. If you want to fly lead, even in a solo campaign, then you have to assume and master that additional burden. If you don't believe me, then just go try to fly with one of the better virtual squadrons and see how far you get with them. Most wont even let you fly with them until you can prove yourself. What does mastery mean? It means that when the AAA and SAMs are coming at you hot and heavy, your reactions are automatic and correct. You don't have to stop and think about what to do, you've done it right so many times in the past that the reaction is automatic. This is equally true for controlling weapsons delivery by wingmen. Flight leadership means that you can refrain from trying to be a one man hero, and that your primary interest is on the success of the entire flight. Like a real pilot, you not only want them to hit their targets, but to RTB safely. On this point I might add that my campaigns really started to become successful once I started bringing my wingmen home safely. Why? Because I stopped thinking about myself and paid more attention to the wingmen. Three air craft can do a lot more damage than just one, even if you never fire a shot yourself. It is possible to get a 100% weapons kill rate on a mission, and to consistently score 80% or higher. Once you gain mastery, this becomes fairly easy because you are doing things right most of the time on a reactionary basis. The following discusses some of the means and methods to achieve this. Wingmen & Weapons Air to air missiles are fundamental, of course, but there is a huge variety of ground weapons that could take years to master. It's a good idea to start out with just a few and work with them until you know their performance and parameters intimately. I would recommend the LGB, the standoff missiles Maverick and HARM, and CCIP delivery of iron bombs. Once you learn these, you'll be well on your way to mastering the others. |
 On this point, please note that all weapons have their limitations, and most of those limitations are included in the sim modeling. So before you blame the sim for not working right, be sure that you know the weapon operation thoroughly. Taking Command Commanding wingmen to deliver weapons is vastly different than using weapons yourself. That's because wingmen are not sitting in your backseat, but are located elsewhere. Consequently, they do not have the same perspective, the same ranges and vectors as you. They may be evading an enemy attack, while you are not. You may be in range while they are not. Moreover, when involving wingmen, some weapons are a lot easier and more forgiving than others. The problems are directly related to target acquisition and how well you can control wings to put them into firing parameters. Simply targeting or ordering "weapons free" won't cut it.
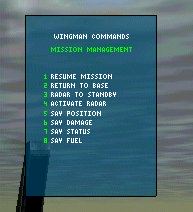 If, for example, you order a wingman to attack, and he is out of range, he will fire anyway - with no score. If you order a wingman to fire a Maverick, and the wingman is on the side of the target that does not have a heat signature, then the Maverick won't guide. If you order an attack on a target that you've already fired at and hit, the wingman will also score a goose egg. Many of the same problems exist for laser guided weapons. The heat and smoke from burning targets often interferes with laser targeting. All of this constitutes fidelity to reality and is not a fault of the sim. If you haven't recognized the realism in the design, it's your fault. Wingman Orders and Effectiveness Wingman effectiveness increases proportionately to your ability to control them and keep them within best weapon parameters, and out of harms way. There are nearly a dozen formation commands, each of which you need to understand. In addition, there are the three wing radio commands to your wingman, the 2nd element, and the entire package. Unless you understand how to use each of these instantaneously in the heat of battle, your mission is not going to be very successful. For a four ship flight on an attack, you have only to issue commands to your wingman (#2) and your second element lead (#3) that in turn will direct #4 as you instructed. These are the "W" and "E" commands respectively. If you use the "R" command for the entire package, you may not get the results you expect if the flight is not in proper formation, for they will all be firing at the moment you direct them to, possibly without being within weapons parameters, and likely at the same target. You don't get credit for killing one target three times. Go to Part III
|
|||
|
Copyright © 1997 - 2000 COMBATSIM.COM, INC. All Rights Reserved. Last Updated September 27th, 1999 |
||||