
|
Tricks of the Trade, Part III By Kurt 'Froglips' Giesselman, MP Falcon 4.0 IP |
||||
|
The N-1 rule. Adjust steerpoints with up to N (the total number of steerpoints including the endpoints) -1. For example, between two steerpoints, any one of the four variables could be locked (two TOTs and two Airspeeds) when adjusting either steerpoint (remember adjusting a steerpoint will automatically lock a second variable). If adjusting a three steerpoint section then two variables can be locked while adjusting a third, and so on. This is very important. Falcon seems to get 'confused' when too many variables are locked. The mission editor will set steerpoints days in advance or behind when the system is over constrained. This leads to a unpleasant cycle of adjusting, unlocking, readjusting all the steerpoints in a flight. If this happens, it is often better to delete the flight and start over on that package. The N-1 rule does not guarantee that a red flightpath will not appear. It does allow an easy recovery by resetting the TOS or Airspeed back to achieveable limits.
 The single most common and frustrating mistake made when adjusting steerpoints is forgetting to unlock all the steerpoints in a flight everytime before making adjustments. There are a few specific instances when you want to have more than one TOS or airspeed locked during adjustment, as we will see when we adjust the DPRK Intercept later in this article. Most of the time it is preferred to let the Falcon mission editor readjust the other TOS and Airspeeds for the flight as we set the specific TOS which is important to us. Unlock those locks! Green does not mean Pass Go and Collect $200! These locks can be more trouble than a SA-7! |
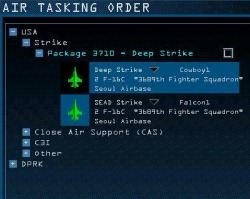
Now that the BARCAPs are in place, the next airspace event is our scramble flight to stop the enemy armor from getting to our AMB. After selecting USA/Strike/Deep Strike from the ATO, turn on the following menu options.
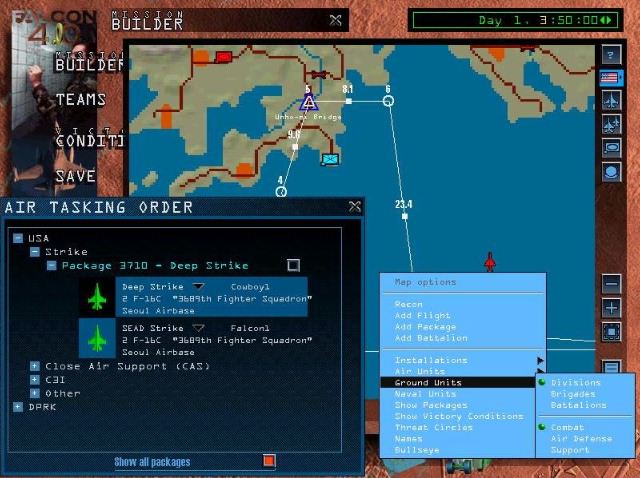 Run the mission clock forward until the enemy armor is just about to cross the bridge. This will be our time on target for the Deep Strike. Follow the checklist to change the Deep Strike's Time On Target (TOT) to the same as the system clock setting. This means hitting the bridge just before the armor gets across. Don't be late! I am a great fan of split second timing. To make things even more interesting in this first flight I have brought the SEAD Strike to the bridge seconds after the Deep Strike with a wingload of cluster munitions. A DPRK armor column stacked up at the bridge, a F-16 with a load of anti-armor weapons, does anyone have any ideas what to do about this situation? The SEAD Strike hit the Unho-ri Early Warning Radar and several coastal AA emplacements previous to arriving at the bridge. The SEAD Strike and the Deep Strike will fly a flightpath south of the BARCAP at very low 'feet wet' altitude. Unfortunately, over water, the early warning radar will still spot them but, hopefully, not in time to vector in the BARCAP. Go to Page Three
|
|||
|
Copyright © 1997 - 2000 COMBATSIM.COM, INC. All Rights Reserved. Last Updated December 1st, 1999 |
||||
