|
A Practical Guide to Using Bullseye Radio Calls
by Rick "Drummer" Centeno |
||||
|
During our weekly online meets, the "185th Reservoir Dogs" fly in packages of 3 to 6 pilots. These pilots often participate in different flights, tasked with different objectives (Strike, SEAD, Escort, etc.). Sometimes different flights follow different routes or become engaged with bogeys while other flights are pressing for the Strike. Trying to communicate our position to the others in the flights, we may often refer to our relative position from known waypoints, using bearing, range and altitude. However, the accuracy and effectiveness of such calls is very much dependent on the relative position of the aircraft and whether we (indeed) have a common waypoint for reference. In the real world, the position of friendly and incoming bogey aircraft are always called out using bullseye coordinates. This bullseye corresponds to a predefined geographic point that everyone uses in the theatre as a positional reference. You can use bullseye to refer to your position or to the position of any other aircraft, like when you ask AWACS to declare a contact friendly or hostile. So any directional bearing and range call uses the same bullseye as a reference instead of the any pilot's individual reference. This allows for an increased situational awareness of all planes involved in the theatre as well as ensuring that the enemy cannot derive other assets positions from the known position of one aircraft. Therefore the actual position of the bullseye is kept secret and in the real world this bullseye position will change frequently (typically once a day). However, in Falcon 4 the geographical position of the bullseye will remain fixed within the same theatre for the entire duration of the conflict.
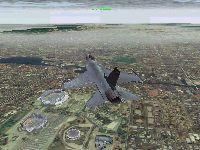
 Which of these three is my bullseye? How to Determine Bullseye Positions? So how do you read this bullseye position and how should you use it in your online play? Or how to react to AWACS giving you positions of incoming bandits relative to bullseye while you're commencing your bomb run? Is the bandit close? From which direction is he closing? Should you break-off or continue? |
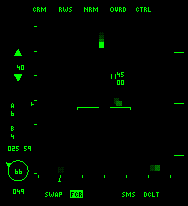
Let's first have a look at your own bullseye position. This information is displayed in the lower-left corner of your radar display and HSD page on the MFD's. Within the circle you will find your range from bullseye. The figure below the circle gives your bearing from bullseye. Finally, on the edge of the circle you will see a little tick mark which points in the direction of the bullseye. In the picture below you can see that our current position is bullseye 049, 66 miles.
 Now what about the figures displayed above the circle, i.e. 025, and 59? These numbers refer to the bullseye position of your cursors either on the radar display or the HSD page. So by putting these over a contact you can determine its position and pass it to the others in the flight. The first number (i.e. 025) refers to the bearing, the second (i.e. 59) to the range from bullseye of your cursor's position. How to Turn to a Given Bulls-eye Position? First you have to establish your own bullseye position relative to the given position. So go ahead and determine your own bullseye position first from the radar or the HSD display. Then determine whether the given bearing is at a higher or lower angle than your own. Next determine whether the distance is larger or smaller than your own position from bullseye. Finally, determine whether bullseye is located left or right relative to you, which you can determine using the little tick mark on the circle. Go to Part II
|
|||
|
Copyright © 1997 - 2000 COMBATSIM.COM, INC. All Rights Reserved. Last Updated August 4th, 1999 |
||||
