
| Falcon 4: Getting to the Target by Gecko 6, 57th VFS Grave Dancers |
||||
|
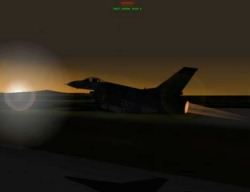
Introduction I am writing this in a language that is by no means technical. I fly flight sims. I make no money and I don't claim to be as good as or even care to compare myself to active combat pilots. They have a serious job to do and I respect them for it. I have an Army background and I am using my knowledge of tactics and applying them to Falcon 4. F4 is perhaps the most demanding combat flight simulator ever released for the PC, and we can all use all the help out there to make our experience enjoyable and successful. Takeoff Every mission starts long before you climb into the cockpit. There is several hours of preparation, planning, coordination, and a high pucker factor! I will start off inside your AC. Before requesting to taxi, you had better run a series of checks. I have a standardized preflight checklist that every pilot is responsible for. This may seem like a real pain, but believe me it has saved my butt many times over. I will break out the systems that I go through. It is up to the VFS commanders to create their specific checklist.
Once I have confirmed all points on my list. I break radio silence with an acknowledgement. Before starting to taxi I request clearance from the ATC. Once cleared to taxi, engage full wheel brakes and throttle up to 90% and back down. This lets you know if there will be control over your power. The flight lead is always the first to taxi, followed by the 2 ship, 3 ship, and so on. Spacing is very important in Falcon 4 due to lag and collision distances. You do not need to touch the AC in front of you to collide with it (one of those little things we have to deal with in the virtual world.) Keep at least 2 AC lengths apart, and when you stop behind the AC in front of you go into a herringbone formation. This will allow you to shoot past the AC in front of you and out into the grass if he stops abruptly. |
 You can do a formation takeoff but it is very difficult, especially with occasional warping. The flight lead should remain on the runway heading until about 4 miles out. The following unit should break and head to the assembly point one mile previous to this, and likewise for #3. This leaves the 4th ship breaking at around 1 mile out. This will aid in the flight regrouping and falling into formation. 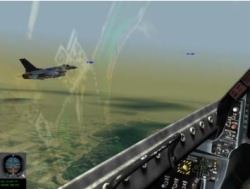 Assembly This is the real test of a Squadron's mettle. Formation flying is essential in the real and virtual world, allowing coverage to the flight and quick scanning for targets. Again I advise that any type of demonstration flying is very difficult, due to collision monitoring within F4. It is not a race to see who can get to the assembly area first, but there is no sin in arriving early. Radar should be off until you turn to the push point. That is what the ADA pukes are supposed to be covering you for. : ) Push Point This is where you earn your money! Lock and load! The flight commander will issue the order to proceed to the target. His decision will be based on the following criteria.
Go to Part II
|
|||
|
Copyright © 1997 - 2000 COMBATSIM.COM, INC. All Rights Reserved. Last Updated August 27th, 1999 |
||||