|
JANE'S F/A 18 : HARM Training Report
by Leonard "Viking1" Hjalmarson |
||||
|
F/A 18 comes with a full suite of training missions, including voice narration prior to the mission and an instructor guiding you through essential steps within the mission. Click HERE to listen to the briefing from the HARM training mission.

 Clicking on the lower left icon brings up the planner screen. From here you can get a close look at your flight path as well as zoom in to the target area.
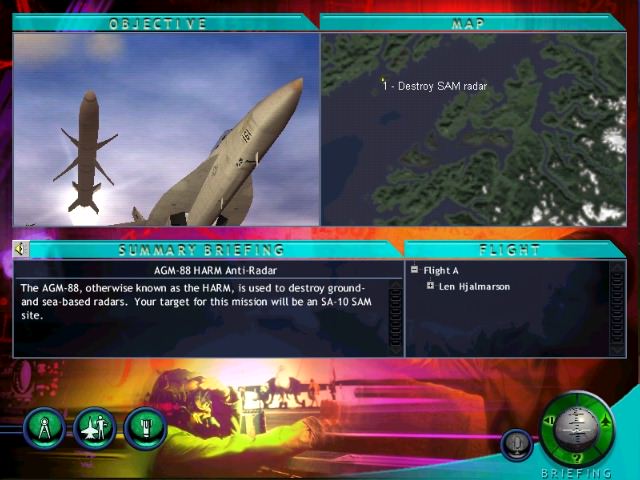
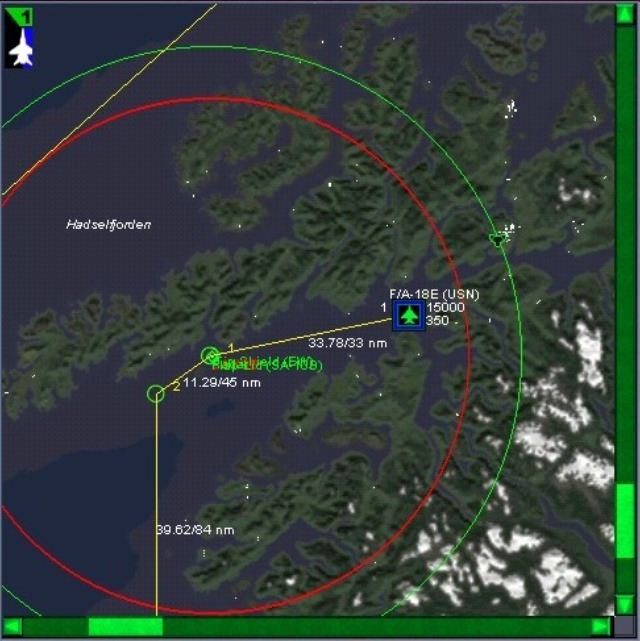 Mission Planning
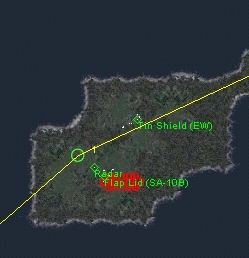 Mission Planning Zoom View There seem to be no real limiations on the zoom level and you can go in much closer than this if you prefer to do so. |
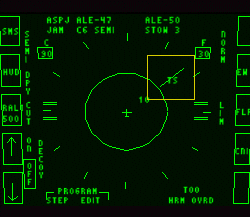
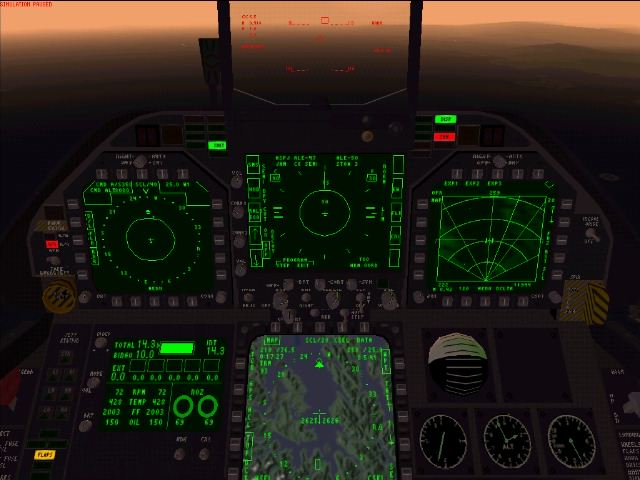 This shot was taken about sixty seconds after entering the mission. The instructor had already told me how to bring up the EW Page on my the Up Front Display. I then selected the SEMI automatic setting for my ALE-47 electronic warfare system to place the unit in RECEIVE mode so that threats would be jammed when necessary. This leaves dispensing of chaff and flares in my control. I also switched my left MDI to the SA (situation awareness) display so that my datalink would give me immediate awareness of any threat aircraft in the area. The SA display also shows targets detected with your own sensors. Other information includes waypoint and distance information, command altitude, airspeed and heading. A moment after the shot above was taken I got a good lock on a SAM radar and let fly with a single HARM. The radar went dead about ten seconds later so it's likely that I would not get a hit. The SAM site locked and launched on me, and in the next shot you will see that I began a turn to place the radar lock on my beam. The shot immediately following is a zoom view of the EW Page. Note the critical threat icon and bearing line contained in the gold box I added for emphasis.
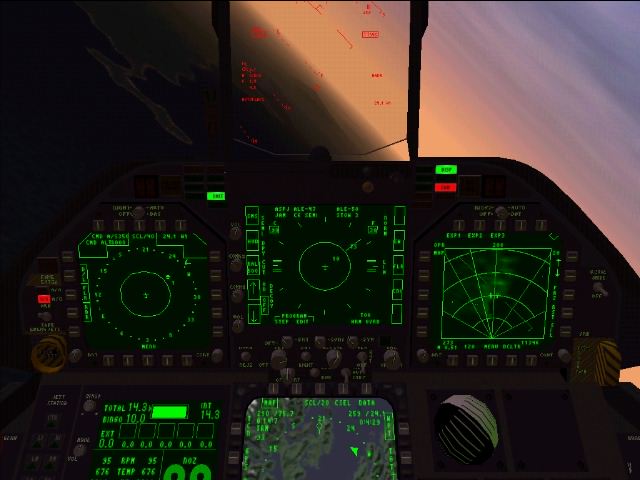
The goal is quite simple; to turn the aircraft until the critical threat line is contained within the Beam manouver cue on either side of the display (the doubled lines at 3 and nine oclock). "Beaming" the threat gives the greatest likelihood of successfully defeating the threat. I was quite interested to see what kind of success I could have with jamming only when placing the threat in the Beam manouver cue, and I didn't release chaff or flares. That gave me an opportunity to get my first close up look at a SAM. Go to Part II.
|
|||
|
Copyright © 1997 - 2000 COMBATSIM.COM, INC. All Rights Reserved. Last Updated December 7th, 1999 |
||||