
| F4 SEAD Briefing by Dave Pascoe |
||||
|
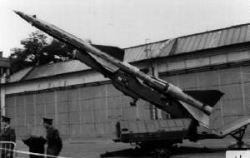
Plan B Turning around and heading inland (north), I order the element to rejoin. One seems to be MIA although the screwy voice comms indicates he's still alive when I know he isn't. AWACS still thinks there are two Python8 flights out there, so I have to listen carefully and sort out the calls. Fifteen miles ahead are a bunch of SA-2's (which are harmful to the health of B-52's nearby) and I want to go home with something to my credit. Ahead a pair of MiG 21's roar skyward from behind a small hill. Geez, are they going fast! These old fingers gotta work fast; the SA-2's are lit up like a Christmas tree on the RWR. I love SA-2's because they can't touch me down low.
 I let the last HARM go. Then I order my wingman weapons free for AG and cover for him, going after the 21's myself. It's drop tank time. I am hitting 600 knots and they are in a steep climb and slowing fast. I get the drop on one with my last AMRAAM and let a Sidewinder go to increase their attention span. My wingie is fire and smoke. The MiG21 that I failed to hit got him. It's far too hot out here; time to RTB. But its no surprise that there are now 5 MiG29's on my nose as I turn around, the one's that were formerly behind us at the EW site. It looks like they nailed at least 5 of our guys. Are these MiGs invincible? Two MiG29s are closing on me as a pair of F-16's break off their B52 escort, and an F5E is engaging the other three. Checking around, only Python 84 of my element is left. I decide to sacrifice him, ordering him to engage while I get out of Dodge. The MiGs make quick work of the Falcons, but while they are engaged, I have time to give them a wide berth. I hit the deck and beat feet in afterburner, wringing the Falcon out for all it's worth. Summary Analysis A lot of unexpected things happened out there, like our guys getting mauled without scoring a single hit. Cavalry comes to the rescue and then falls in a ditch. As with any Lead who manages to get his flight wiped out, I'm pissed off and looking for something to blame other than my own bad decisions. Never mind; let's look at what really happened out there.
|
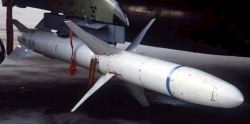 The briefing shows that while we missed our primary target, we got two SA-2's, a ground vehicle and a couple of KRaz something or others. But I was the only survivor. The price was far too high even for Falcon 4.0 where getting slaughtered early-on is routine. While this mission reveals that having a Plan B can be a good idea, staying on station that long brings the interceptors in a hurry, further reducing the chances of success. In hindsight, a 15 mile separation between targets was too short. Escaping from the defenders at the primary site, they simply followed us. Only by sacrificing my element did I escape. Carrying HARMs alone on a single target strike is a bad idea. When target radar shuts down, or starts playing games with you, it's game over. In Fast, Out Fast When enemy air defenses are strong, the key to success is a lightning strike, getting in and getting out fast. If you have to make multiple passes, chances for survival, let alone success, are about nil. Had I been carrying a couple of Mavericks (having adequate time for a good line up with bombs is doubtful; I'm not a hotshot bomber) that EW radar would have been history. Instead, it's still operating. I've yet to fly an uncontested SEAD mission in F4. On every mission there comes a time to make the decision on whether to abort. The opposition was not overwhelming, but it proved that I was over-confident and then made a bad decision. Good luck is the exception rather than the rule. When it comes to decision making under marginal conditions one should always plan on things getting worse, not better. Miraculous escapes are for the movies. Go to Page Four
|
|||
|
|
||||
Copyright © 1997 - 2000 COMBATSIM.COM, INC. All Rights Reserved.
Last Updated April 8th, 1999