Page 1
LGB Bombing Strategy for Jane's F/A-18
by Colin "Vector" HuntCompleting missions in Jane's F/A-18 or in any hard core sims is a lengthy affair. All affairs must start somewhere however, and we begin here.
It all starts in the mission planner. Review your threats. There are some SAM sites operating, and chances are they show up in the mission window. You are usually given 4 guys to accomplish the mission, but do not be afraid to use more. Take along an extra pair, and using the targeting window, find the major SAM threats and give them orders to attack the command radars. Then set an IP waypoint so you know when it's time to dispatch them on their mission. This waypoint should be well outside of the threat ranges, so you to have time to coordinate things. Also you may want to put waypoints on the major SAM sites, so you know exactly when you're in HARM range. Next, go to detailed briefing and write down all the critical information there. Package call signs, support flights and call signs, and waypoint information (such as which waypoint is the SA-11 site, and which the target).
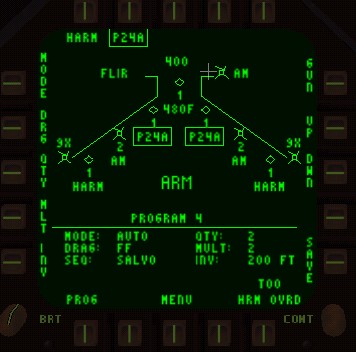
Now you're on the carrier. First I set everything up on the carrier before hand. Harm SP mode, gun rate of fire and funnel, bomb release programs, setting bingo fuel level and putting the time in the HUD. For bomb release programs be sure to set up a program with the following specs: Mode: Auto, Qty: 2, Multiple: 2. This will drop two bombs at the same time using the auto release mode.
Fig. 1. MFD setup to drop two bombs at onceThen, we're off in the air. I climb to a few thousand feet, and fly slowly and kind of in a circle to allow my wingmen to form up. I usually always give them the line abreast order. Once we are all formed up, we begin moving to waypoint 2.
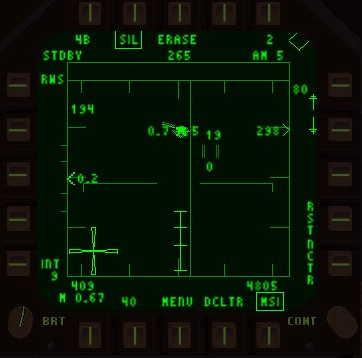
You will probably be in a/a mode and have the radar on RWS sweeping the skies for bogeys. Also turn on your MSI link, so you can see data linked targets in the radar and shoot at them. Periodically bring up the SA page and check the nearest bogeys, if one strays past the 20 mile ring, the CAP has failed and you have to clean up the left overs. If it's particularly bad out there, don't hesitate to call in assistance from AWACS. Hopefully you won't have much trouble getting to the IP point.
Fig. 2. MSI mode in conjunction with a silent radarOnce there, if you have extra flight members assigned to SAM threats, order your section to orbit here, and you do the same. Tell your division to attack primary ground targets. They should merrily be off on their way, and listen for their radio comms so you know when they have destroyed their targets. Hopefully they will come back.
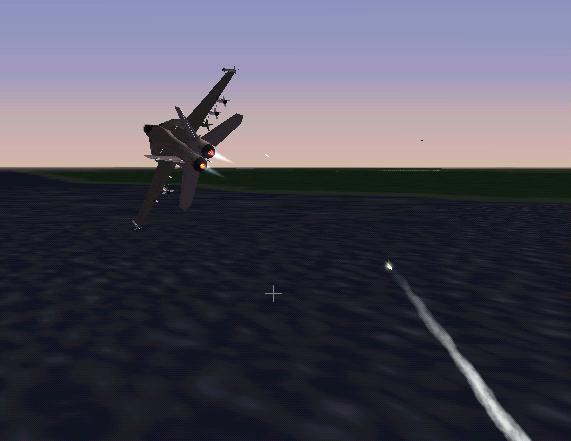
Now consider what is left out there. If your division managed to take out the heavies, then you should know what kind of SAMs are left operating in the area. If at all possible, it's best to head high, really high. Climb to around 20,000 ft or so before heading into the target area. If they have not destroyed the heavies, then it's suicide to go high. Instead go low, 200ft or less. Deal with threats along the way using your own HARMs, and also your division might have HARMs left so tell them to attack air defenses.
Fig. 3. Suppression of the air deffences is key